Don’t know how to create a bootable USB for Ubuntu 24.04 on Windows? No worries!
This blog demonstrates the process of making a bootable USB for Ubuntu 24.04.
Create a Bootable USB for Ubuntu 24.04 on Windows
Ubuntu is an open-source Debian-based Linux distribution and Ubuntu 24.04 (noble numbat) is its latest release. More specifically, to install and use Ubuntu 24.04 on your device, you can either use a bootable USB or a virtual machine.
For instance, to create a bootable USB for Ubuntu 24.04 in Windows, follow the below steps.
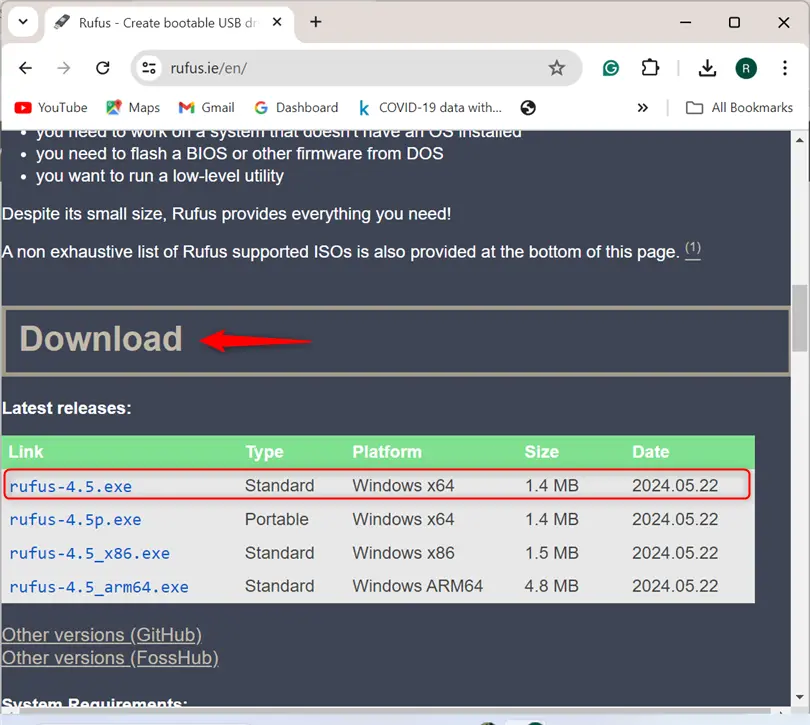
Step 1: Download Rufus Tool
First, download the Rufus tool used to create a bootable USB. For this purpose, navigate to Rufus official website and download its executable file:
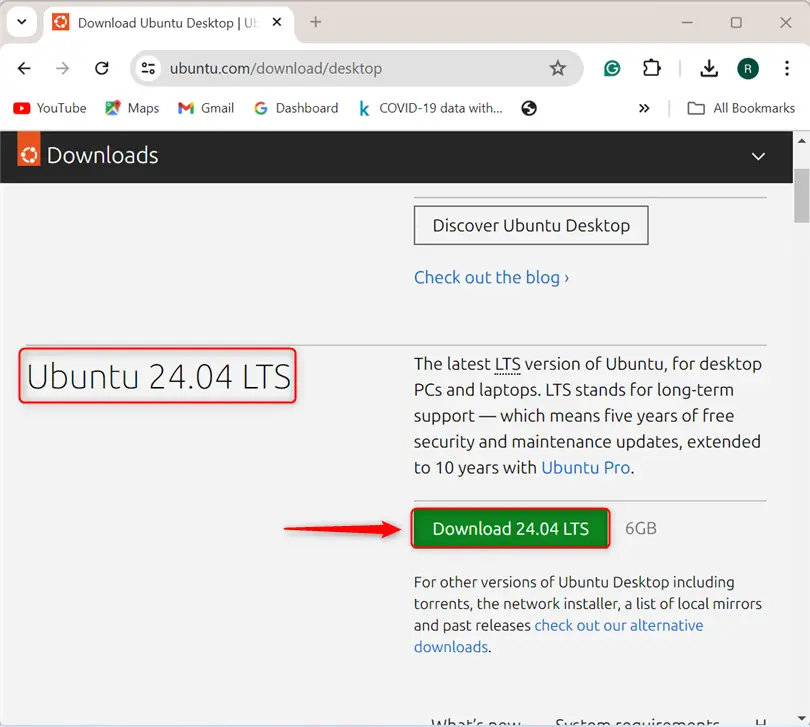
Step 2: Download Ubuntu 24.04 ISO Image
Next, navigate to the Ubuntu releases official page and download the Ubuntu 24.04 ISO image:
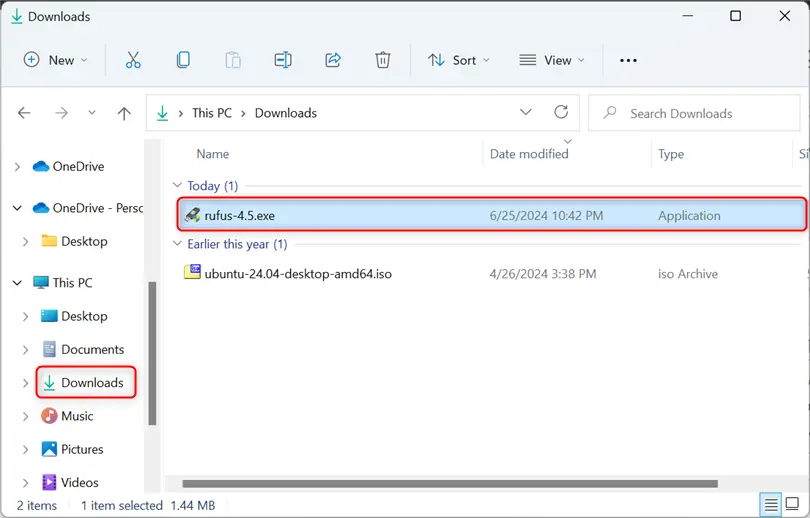
Step 3: Launch the Rufus
Open the Downloads folder and launch the Rufus tool by running its executable file:
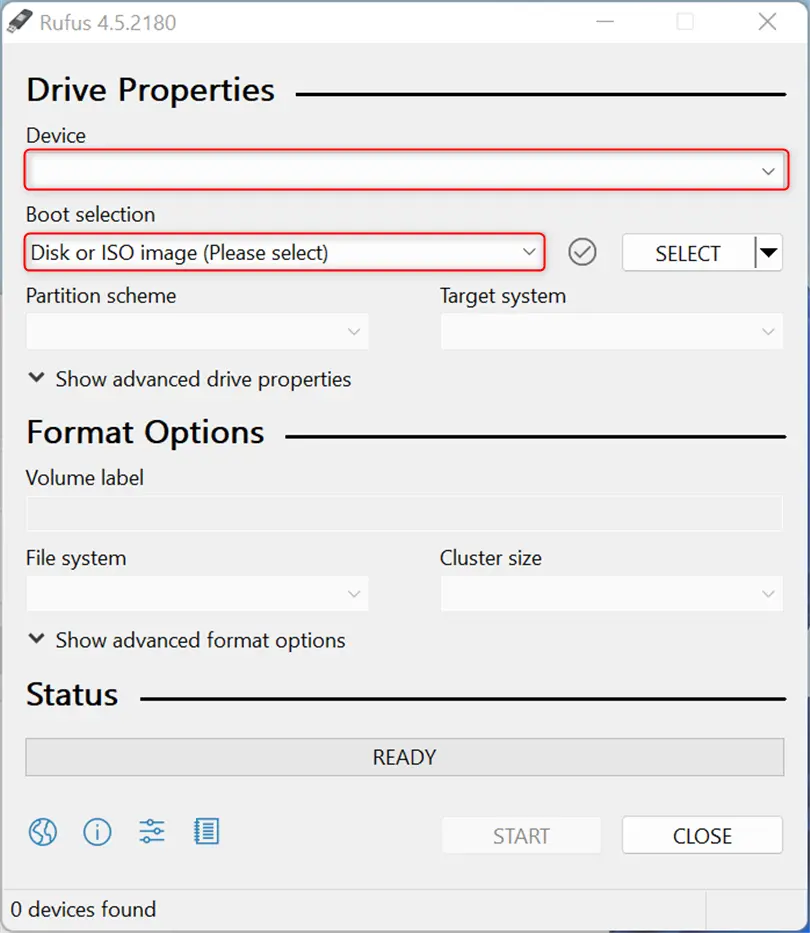
Step 4: Select the USB Device and ISO Image
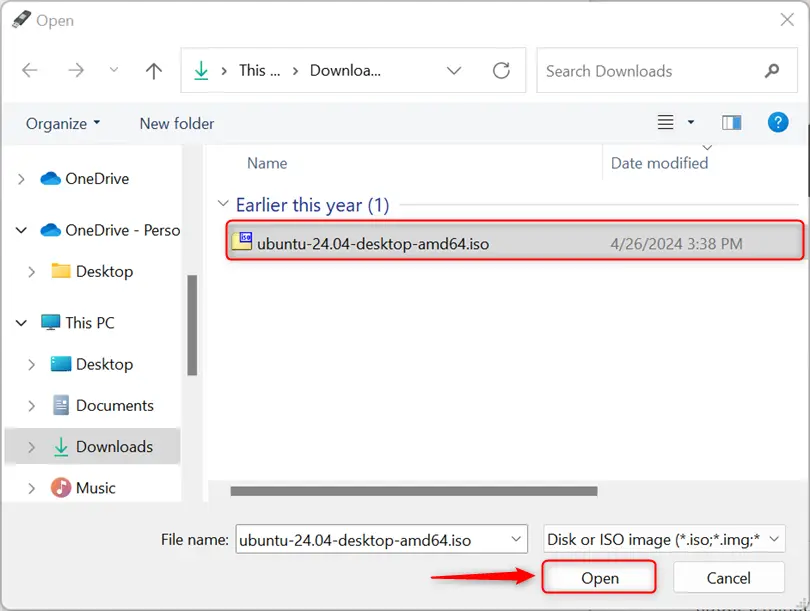
Next, select the USB device from the “Device” drop-down menu. Then, select the Ubuntu 24.04 ISO image from the “Boot selection” menu:
Browse the location where the ISO image is downloaded and open it:
Step 5: Start Creating a Bootable USB for Ubuntu 24.04
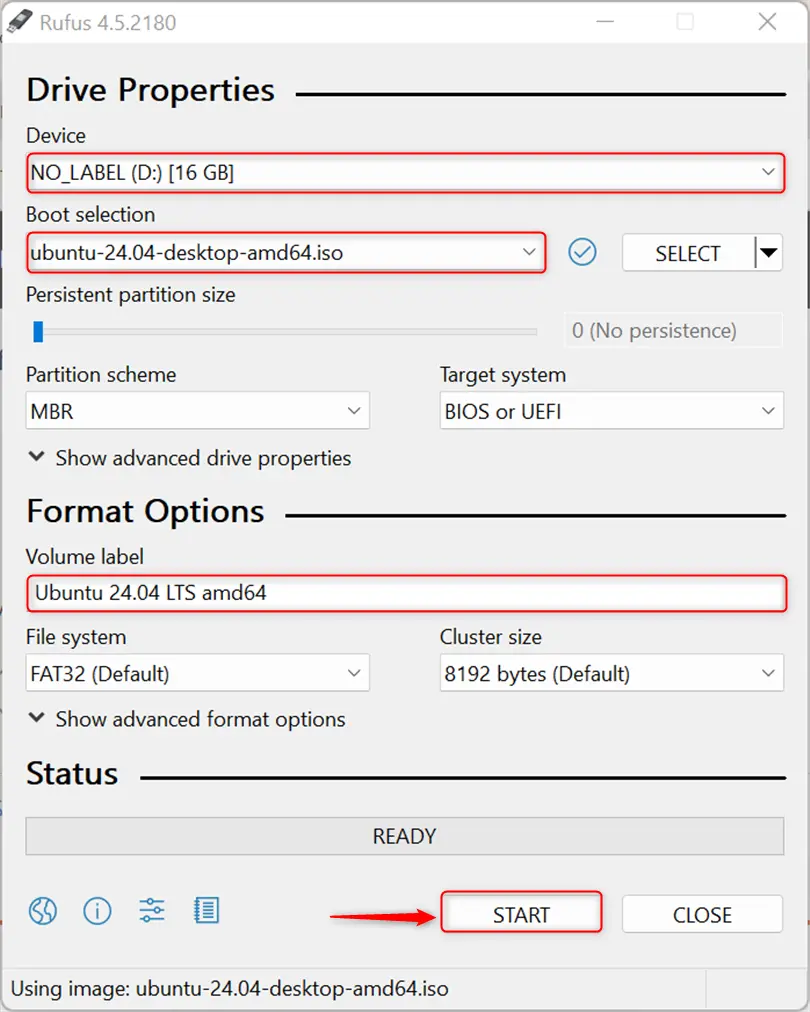
After selecting the ISO image, the “Volume” label will start showing the release name of the selected ISO image.
To start creating a bootable USB, press the “Start” button:
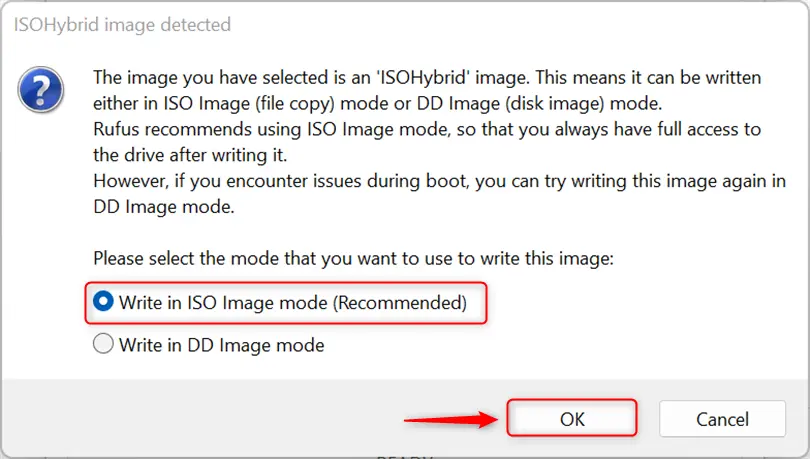
From the “ISOHybrid image detected” wizard, select the below pointed “Write an ISO image mode” radio button and press the “OK”:
Handle the appeared Rufus warning by pressing the “OK” button:

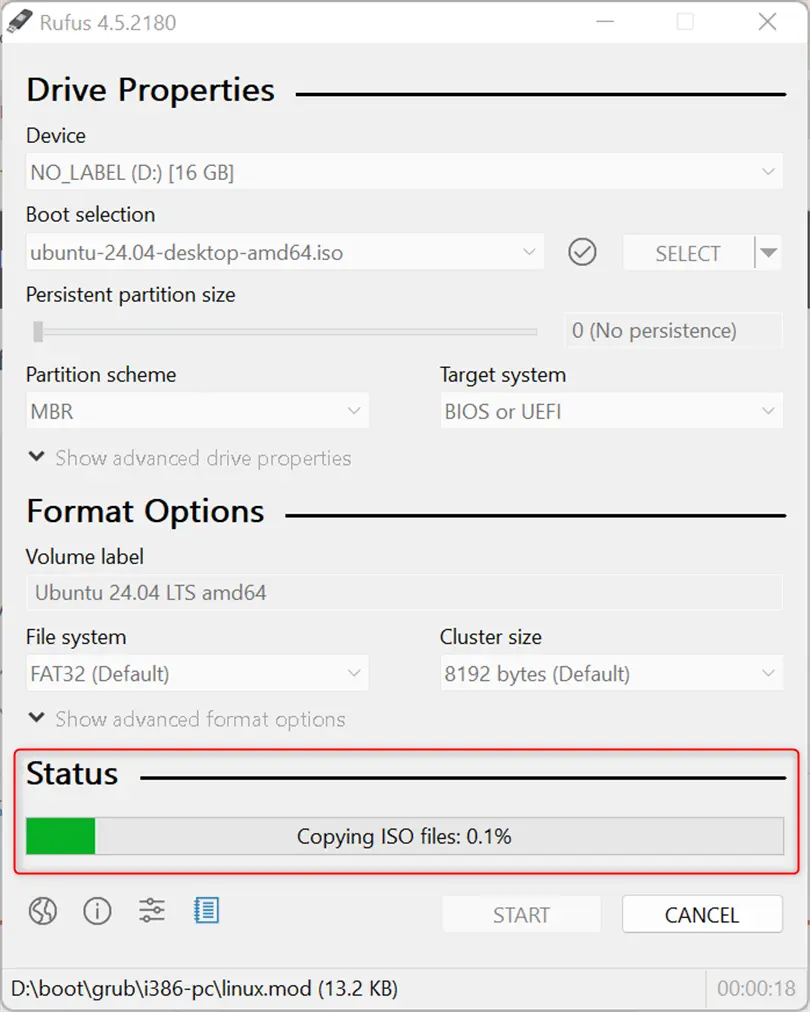
Step 6: Writing the ISO Files
This will start writing Ubuntu 24.04 files in USB to make it bootable:
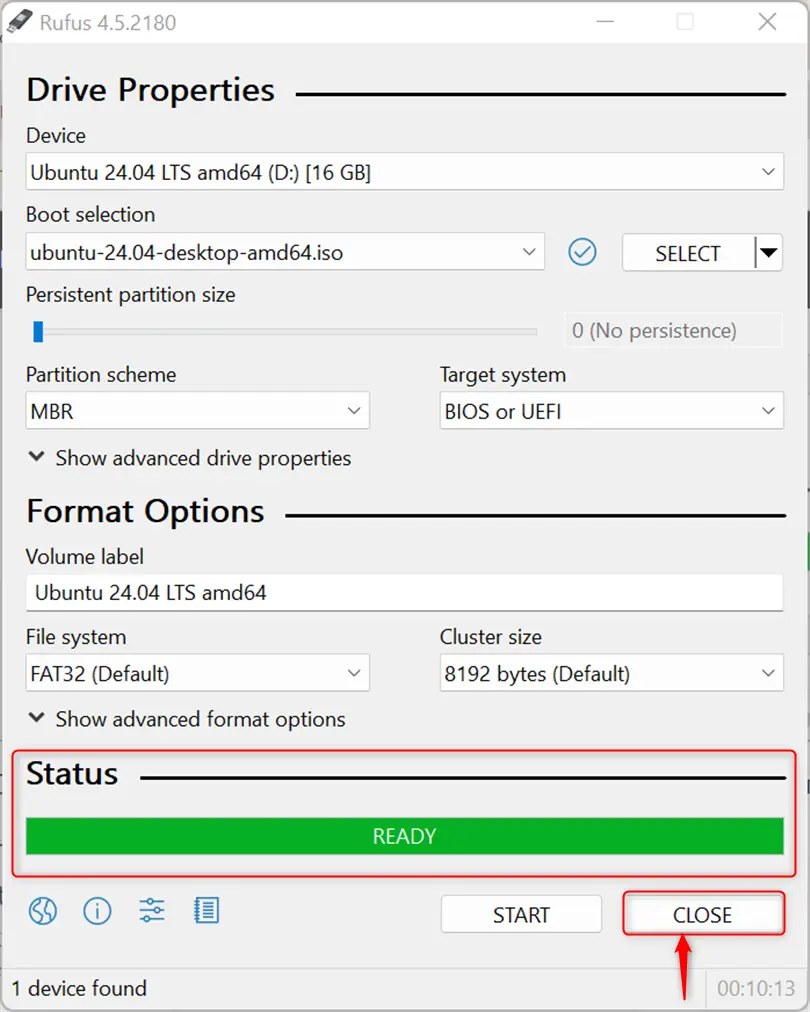
Step 7: Complete the Process
After completing the writing process, the status will be updated as “Ready”. To complete the process, hit “Close”:
Step 9: Boot the Ubuntu 24.04 on the System
Now, inject the USB into the device and power on the system. This will boot the Ubuntu 24.04 through USB. If the OS is not booting up from USB, use the “F12” key to access the boot menu and choose USB as the boot method.
To sum up, download the Ubuntu 24.04 ISO image. Then, launch the Rufus tool, select the USB device and ISO image, and start creating the bootable USB.
Software engineer with 3+ years of expertise in Linux, Windows, and multiple programming languages. Proficient in Docker, Kubernetes, and Elasticsearch. Passionate about building scalable systems and helping others through clear, problem-solving guides